| | SCI HOME PAGE | CATALOG | HOW TO ORDER | GREAT SPACE LINKS | FAQ | |
Lunar Prospector Presentation Guide
| | SCI HOME PAGE | CATALOG | HOW TO ORDER | GREAT SPACE LINKS | FAQ | |
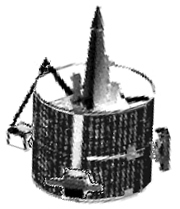
The Assembly Instructions Booklet guides you through building your Lunar Prospector model in its Lunar Mapping configuration depicted in the Fact Sheet, which is the configuration in which all of its appendages are fully deployed.
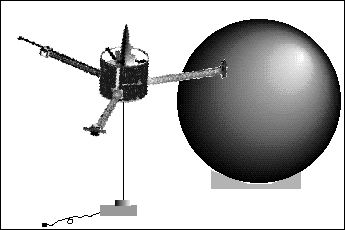 This display requires adult supervision if a child is working on it. Obtain a small electric motor which is geared to rotate its shaft at about 12 RPM. Arrange the motor so it will be securely supported with its rotating shaft pointing straight up. Attach a stiff steel wire, or a plastic rod, to the motor's shaft. Adjust the wire or rod so that it extends straight up from the motor's shaft, and does not wobble as the motor turns. Now attach the bottom center of your assembled Lunar Prospector model to the top of the rotating wire or rod. Adjust to eliminate any wobble as it rotates.
Alternatively, you might wish to mount the motor on the ceiling with its rotating shaft pointing straight down. Attach a thread or a monofilament line to the rotating shaft, and suspend the model as described in the Simple Hanging Display above. CAUTION: If you choose this display method, be very careful to mount the motor securely so that it cannot fall accidentally and cause personal injury.
This display represents the way the spacecraft rotates constantly about its central axis (the Z axis) as it orbits the Moon. You might want to place it near a lunar globe for effect.
A rotating display commands attention, and can be used in planetarium or museum exhibits, retail stores, and science fair exhibits, to take best advantage of the fact.
 (1) Assemble your Lunar Prospector model kit according to the regular Assembly Instructions. Next, take a pair of sharp scissors, and cut each science instrument off of the end of its boom, leaving about two millimeters of the boom still attached to the instrument.
(2) Cut the three booms off of the spacecraft, leaving about two millimeters of boom protruding beyond the solar panel.
(3) Re-attach each instrument, in the same orientation it was before removal, by gluing the remaining short sections of boom together. Each instrument should end up being mounted about four millimeters out from the solar panel. Make sure each instrument is squared up and not attached crooked with respect to the spacecraft.
(4) Once the glue has dried, bend the Magnetometer up, making a crease where its boom attaches to the Electron Reflectometer (See Fact Sheet for these instrument's names). Bend the Magnetometer back toward the solar panel, and glue its boom where it touches the arm which extends from the inner spacecraft bus to the top of the solar panel. See illustration.
This represents the configuration in which the spacecraft was transported, and launched atop an Athena II rocket with a Trans-Lunar Injection (TLI) stage. Once the spacecraft had separated from the launch vehicle and TLI, and it was free-falling toward the Moon, the three booms were commanded to deploy from within canisters inside the spacecraft. The deployment mechanism, which controlled the release of these tightly-wound fiberglass booms, is visible from the bottom of your spacecraft model. The booms are under spring-like tension when coiled within their canisters, and the deployment mechanism simply reels out a tape to let them extend, unwinding at a controlled rate.
For more information, be sure to visit the Lunar Prospector web site.
| | SCI HOME PAGE | CATALOG | HOW TO ORDER | GREAT SPACE LINKS | FAQ | |