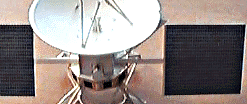
7. ASSEMBLE AND INSTALL THE SOLAR ARRAYS.
View the whole assembled model
- From sheet B release the long SOLAR PANEL SUPPORT ARM. Bend a crease into both its lengthwise hinges, keeping the printed side out. It may help to bend them over a straightedge. Insert the three tabs into the slots and secure with glue. Add a few more drops of glue along the seam to hold its shape.
- On the top side of the Spacecraft Bus, draw an arrow pointing outward above the PEP. Ignore the arrow which is printed on the panel adjacent to it. The correct arrows to use, then, will point outward in a straight line on either side of the Bus. We apologize for this printing error.

- Glue the finished SOLAR PANEL SUPPORT ARM down onto the top of the SPACECRAFT BUS so that it covers the two arrows pointing outward. Its two struts should extend downward at an angle, touching the sides of the bus. Bend these struts straight down, and secure in place with glue. Make sure the arm is centered over the bus and points straight out.
- From Sheet B release the two SOLAR PANELS. Using a straight edge, crease each of the hinged edges downward away from the silver and blue side to help maintain a flat shape. Apply low-moisture glue sparingly to one crosshatched strip on the SOLAR PANEL SUPPORT ARM. Place the SOLAR PANEL down onto the SOLAR PANEL SUPPORT ARM so that its notched edge fits over the arm, and meets the inner edge of the crosshatching. Be careful to align the panel at right angles to the arm.
- Repeat with other panel, installing at other end of the SOLAR PANEL SUPPORT ARM.
| GO ON TO THE NEXT STEP |
| INSTRUCTIONS FIRST PAGE |

